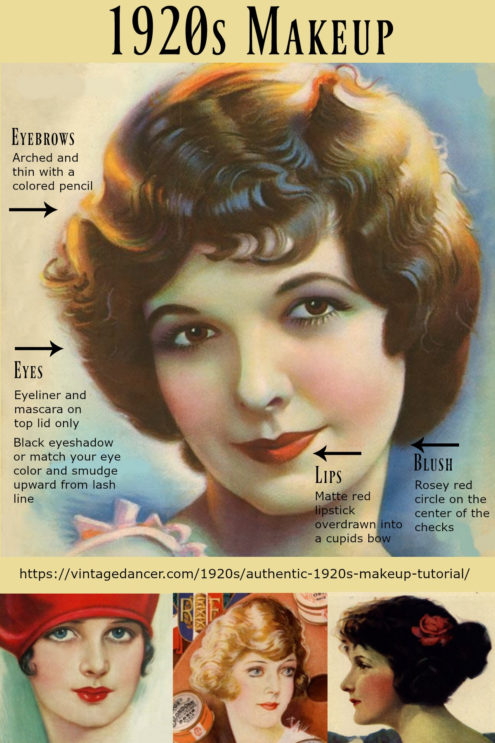
Most 1920s makeup tutorials online show how to apply 1920s inspired makeup or looks based off of black and white film movie stars. Both are inaccurate to the real 1920s. Makeup for the everyday woman was much softer and more natural. This tutorial is about creating the natural 1920s look for both the day and evening. Remember that the more authentic colors and application techniques you use, the more authentic the results!
The guide included here is based on the 1927 booklet Etiquette of Beauty by Dorothy Cocks.
If you haven’t already, read about the history of 1920s makeup first.
What you need:
- Loose face powder in your skin tone or one shade lighter for early ’20s looks.
- Liquid Rouge in red, not pink or orange. Matte, not glitter.
- Black or Brown pencil for eyes and brows.
- Matte red lipstick and matching lip pencil.
- Black or brown mascara.
- Dark matte eye shadow in black, green or blue.
Step 1. Powder
Choose your day time powder to match your skin exactly. It should be loose in a jar and applied with a fluffy powder puff. Cream based powders or powder compacts are often too thick for the light ’20s look.
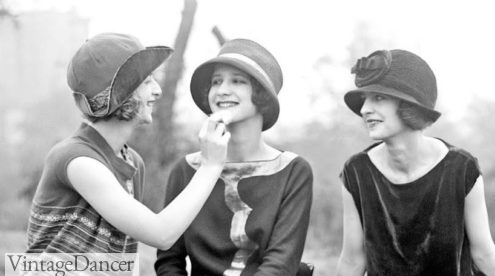
The Duncan Sisters touching up with face powder
Apply powder in small sections brushing downward following the contours of your face. Powder is not meant to mask your skin but to fill in and even out color and texture as well as reduce shiny spots.
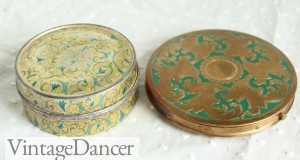
1920s Vintage Powder Compacts
Step 2. Rouge (blush)
Apply liquid rouge (rosy red for light skintones or raspberry red for deep skintones) on a wet cotton ball and blend into a half circle on the center of your check just under the cheekbone. Blend the rouge no further down than the tip of your nose. The wet cotton keeps the edges soft, preventing harsh blush lines.
Keeping the rouge high on the cheeks keeps a youthful appearance. If your ears are exposed, add a hint of powder rouge to them. Pale ears are considered unsightly. Don’t forget to rouge your knees, too!
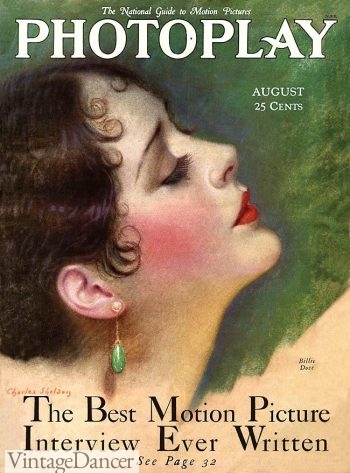
1928, blush is a focus in the ’20s
“Rouge should be applied in the form of a thin crescent moon on each cheek. The center of the crescent comes about on the cheek bone. The cusps fade off as they follow the curve of the cheek, parallel to the eye, back toward the temple and for-ward toward the nose. Put the merest bit of rouge on first, and blend it, blurring the edges till the color is as natural as a blush. Add more rouge, a little at a time, to increase the depth of the tint, if necessary, and keep on adding and blending and blurring, to build up the perfect semblance of youthful color.”
Tip: Round or broad faces should apply the rouge slightly closer to the nose. For thin or oval faces, apply rouge further away from the nose. For very long faces, add a dab of rouge to your chin.
A day look- Light on powder, heavy on blush and natural red lips.
Tip: Liquid blush is not easy to find in stores. A theater makeup supply store usually has them. Otherwise, a blush creme is your next best choice, although still hard to find. LBCC makes a replica 1920s liquid rouge which is fabulous and Besame has a few cream blushes too.
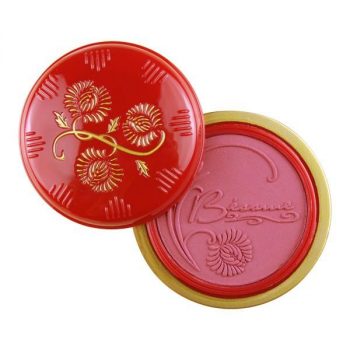
Besame cream blush is amazing!
Step 3. Lipstick
Lips should be matte red. There are a million shades of red out there. Most can be eliminated because they have some sparkle added to them. Going with a matte rose red will make all the difference in creating an authentic vintage look.
I personally like L’Oreal Infallible Le Rouge Lipstick in “Target Red” (discontinued) or “Ravishing Red” for my pale skin with pink undertones. I also really like Besame Red or Noir Red for a dark deep dramatic red. For deep skintones, I hear The Lipbar Cosmo or Catwalk or MAC Ruby are excellent bold reds.

Charlotte E Ray wears a deep red lipstick, lined eye, arched eyebrows, and possibly light shadow
You may have to try a few shades before you find the right red for your skin tone. Any matte red with a hint of orange or yellow will be the most authentic to the 1920s. For a daytime look, the red should be a bit lighter and for an evening look, a deep “flame” red. Avoid pink, metallic, purple, etc
The cupid’s bow lips should look like a kissable pout without pursing your lips.
It is very useful to start with a lip pencil first to outline your lip shape and then blend the line down onto your lip. Top with the lipstick. If you have full lips, line your lips just on the inside edge and if you have thin lips line them just a hair on the outside. Always smudge the lines in towards the lips, otherwise the lip pencil line will be too harsh.
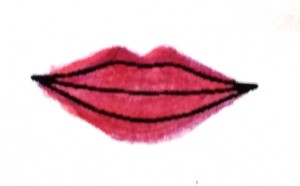
Overdraw lips to form the cupid’s bow on top and fuller lip bottom
Overdrawing the top lip points will make a “cupids bow.” The effect is to make you look as young and childlike as possible. You can also play a little trick with your lipstick to enhance the cupid bow lip even more.
“If you leave your upper lip free of red in the very center and arch the color on the curve of the lip on both sides of the center, you make your mouth look most temptingly soft and child-like. There is no means of counting the myriads of women who have practiced that trick since the world began.” The bottom lip if naturally thin can also be overdrawn for more plumpness.
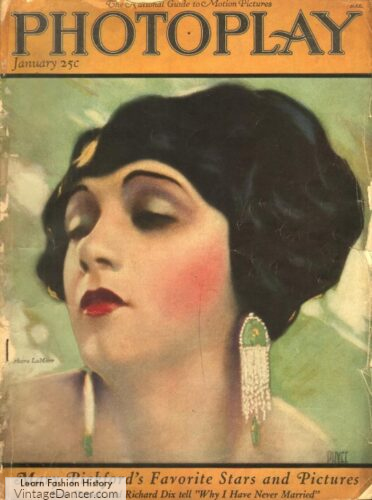
1924 Actress Barbara LaMarr
Step 4. Eye Makeup
Eyebrows
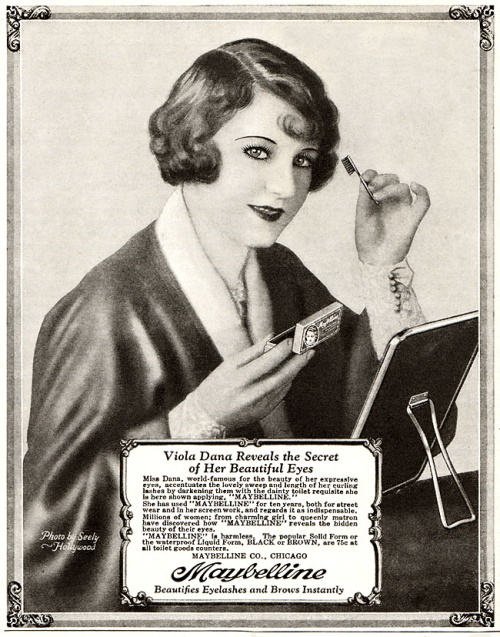
1926 Maybelline Eye Brow set
Although arched eyebrows were the style of the 1920s, plucking was discouraged. Instead, brows could be shaped with a brow brush.
Brush the hairs up from the bottom then down from the top to create the arched line. A small dab of petroleum jelly on the brows will keep them in line and add a bit of shine acceptable for evening wear. Only if you have very thin eyebrows will a pencil be necessary. Keep the color natural. Only black or dark grey haired ladies should use a black pencil.
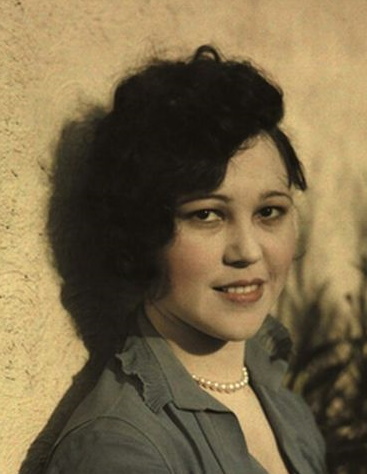
Naturally curved thin eyebrows, light blush, light lipstick for daywear (Latina girl)
Eye Lashes
Use a pencil in a shade that matches your natural hair to draw a line along your upper eye lid only continuing past the edge just a hair, no more than 1/4 of an inch. Smudge the line into your lashes. This aids in making your lashes look fuller.
If you wish to line the lower eye lid, keep in very thin.
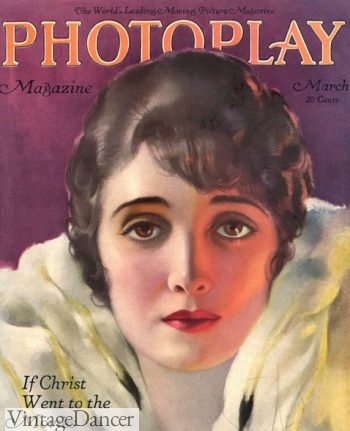
1920, notice her eye shadow matches her eyes and mascara in heavy on the top lashes
Mascara was used in the late 1920s. It came in a cake form that had to be applied with a wet brush (similar to the one you shape your eyebrows with).
If a woman didn’t have the latest makeup fad, she could use some brown liquid/cream makeup and apply it first to the fingers then to the lashes by batting the lashes onto the finger. I had to do this the other day when I couldn’t find my mascara and it works quite well. The look is softer and more natural. It makes the middle and tips of the lashes fuller and the inner lashes clear.
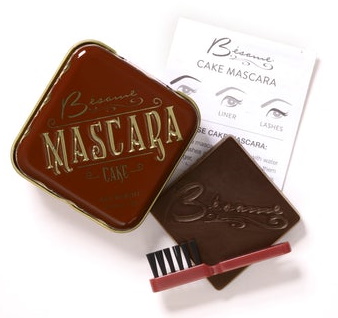
Tip: Go ahead and use your normal mascara in a tube. It is a lot easier than brushing on powder. Use brown for day and black for evening. Keep the application light for daywear but you can go medium or very heavy for evenings.
1928, heavy lined and mascara eye for a dramatic movie star look. 1928
Eye Shadow
Heavy makeup around the eyes was considered too much for day wear. Eye shadows were merely eyebrow pencil applied to the lash line and then smudged upwards over the lid.
If you use shadow for the day or afternoon, keep the application light and even over the upper eyelid. In fact, to lighten the harshness of eye shadow it is a good idea to apply face powder over the eyelids including the shadow you just applied. It softens the look.
1928 lined eye with very light dusting of shadow for daywear
The following tips should only be applied for formal afternoon parties and eveningwear
A touch of black, brown or other dark color eye shadow right on the upper lash line with bring out the brightness of your eyes. Don’t apply the shadow over the lower lid at all.
Only movie and film stars applied heavy eye shadow, which was necessary for filming in black and white. For this look grease paint was applied to the upper lip, almost to the browline. A smudge of paint could be applied under the lower lashes for even more drama.
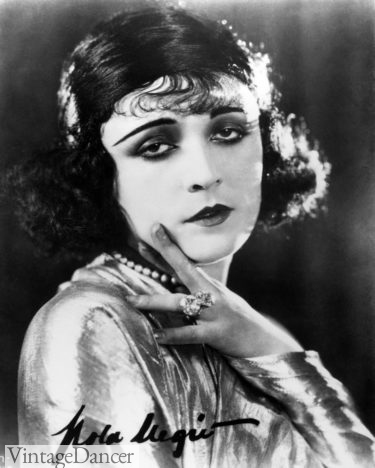
Pola Negri wears very dark shadow for the stage
Color eye shadows were chosen to match eye colors in the late 1920s*:
- Blue eyes: green or blue eye shadow, brown mascara, and eyeliner.
- Green eyes: gray or green eye shadow, brown mascara, and eyeliner.
- Brown eyes: brown or plum eye shadow, black mascara, and eyeliner.
- Black eyes: a very faint red could be applied.
* In the very late ’20s, eye pencils started to come in the colors of eye shadow which was an option for evening looks. For daytime looks, stick to brown or black.
-
- Clara Bow in 1929 wears a light blue-green eye shadow
-
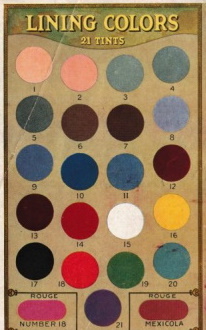
- Steins eye shadow, 1930, design for the stage but often used by ordinary women
1920s Theater Makeup
Many online tutorials and video makeup look to silver screen movie stars for inspiration. That is fine for fun, but you must keep in mind makeup was chosen to look good in black and white pictures and later color pictures. Artificial lighting, shadows and the actresses’ skinand hair color came into play when painting a 1920s face. As you can see below these garish colors on a real person would be awful but for the movies they were perfect.
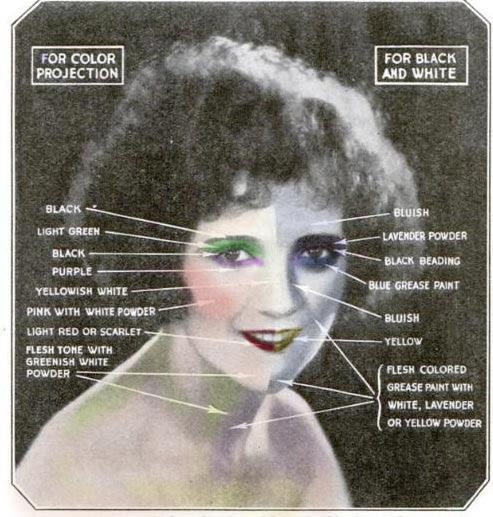
Theater and Movie Makeup is heavier than Real Life Women’s Makeup.
Additional resources:
- Retro Makeup: Techniques for Applying the Vintage Look by Lauren Rennells is a great book to have on hand. The looks are a bit more movie star than day wear but the modern techniques are helpful. I love her Retro Hair book, too.
- Makeup for darker skin tones during the jazz age by Lauren Rennells. History and color guide.
- Besame Cosmetics – Vintage makeup colors in beautiful cases. Read their guide to 1920s makeup.
- Vintage Makeup Guide – 1920s – The best way to learn to apply 1920s makeup is from a direct source (such as what I did for this article). This downloadable eBook is a copy of a very popular 1920s vintage makeup and beauty routine book. It goes into more detail on contouring your face, choosing colors, and basic skin care. Highly recommended.
- 1930s Makeup – Move on to the next decade with Old Hollywood inspired makeup.
1920s Style Clothing
For all you 1920s style clothing needs, and fashion history, we have it listed at VintageDancer.com – 1920s dresses, 1920s tops, 1920s shoes, 1920s headbands, 1920s jewelry, and more.
Debbie Sessions has been teaching fashion history and helping people dress for vintage themed events since 2009. She has turned a hobby into VintageDancer.com with hundreds of well researched articles and hand picked links to vintage inspired clothing online. She aims to make dressing accurately (or not) an affordable option for all. Oh, and she dances too.